Super Easy French Dip Sandwiches

Standard

French dips are one of my favorite sandwiches to get when I go out. I know they will never skimp on the meat and that’s all I care about! When I found this recipe, I was overjoyed! Super simple, super quick, and super delish. Three of my favorite things.

Easy French Dips

Original Recipe

French Dip Sandwiches

2c Broth, either beef or veggie

1/4c Chardonnay

1t Minced garlic

1/2t Thyme

1lb Deli roast beef, rare if possible

1T Butter

4oz Mushrooms, sliced

1/2 Onion, sliced

4 pieces French bread

4 slices Provolone

1. Melt butter in sauce pan and saute mushrooms and onion until soft

2. Meanwhile, bring broth, chardonnay, garlic, and thyme to a boil

3. Submerge roast beef in broth until warmed and remove. Buying rare deli meat helps prevent overcooking the meat and getting tough at this stage.

4. Once meat is warmed, remove meat from the broth and pour broth into individual bowls for dipping

5. Put oven on broil and make sandwiches. Layering provolone, veggies, and meat on the French bread. Broil until cheese is melted and bread is crusty

6. Dip in broth and enjoy!

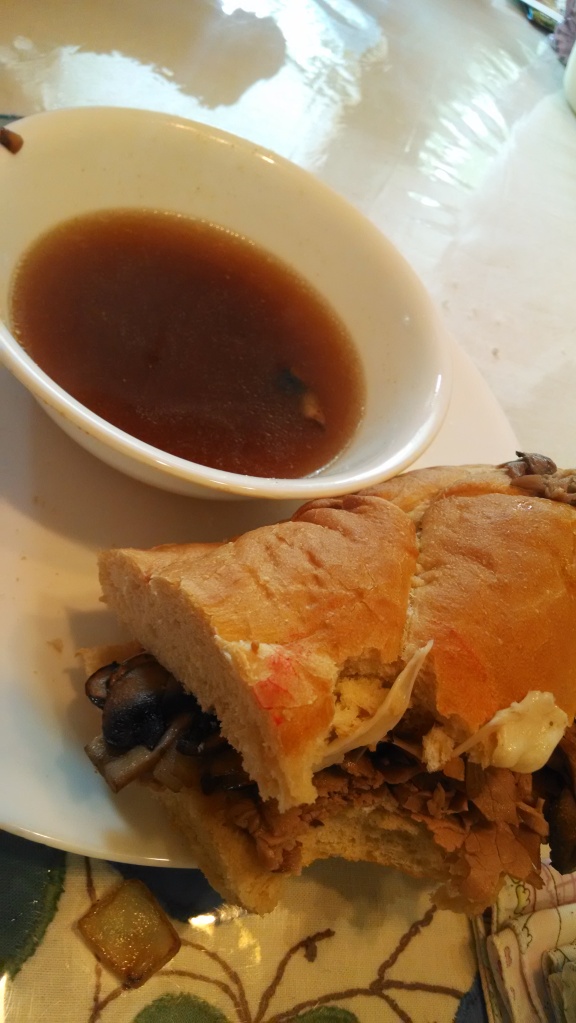
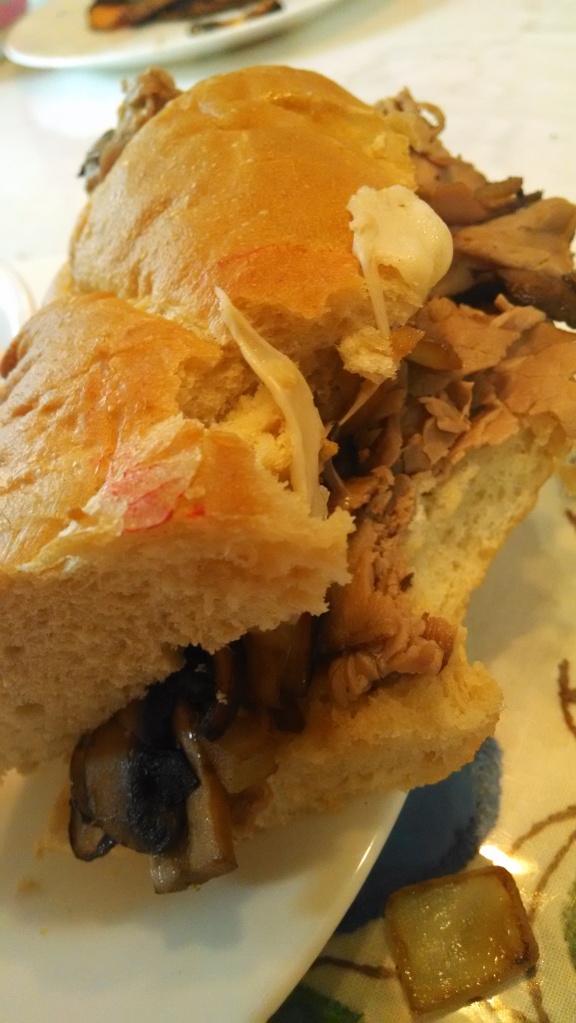
Easy French Dips

Yea, there’s lipstick on my sandwich. I almost forgot to take a picture, but don’t worry, I remembered after bite one!
Massive Planter Stand

Standard

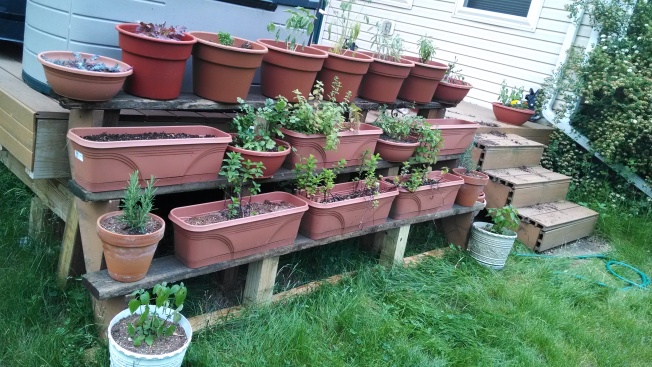
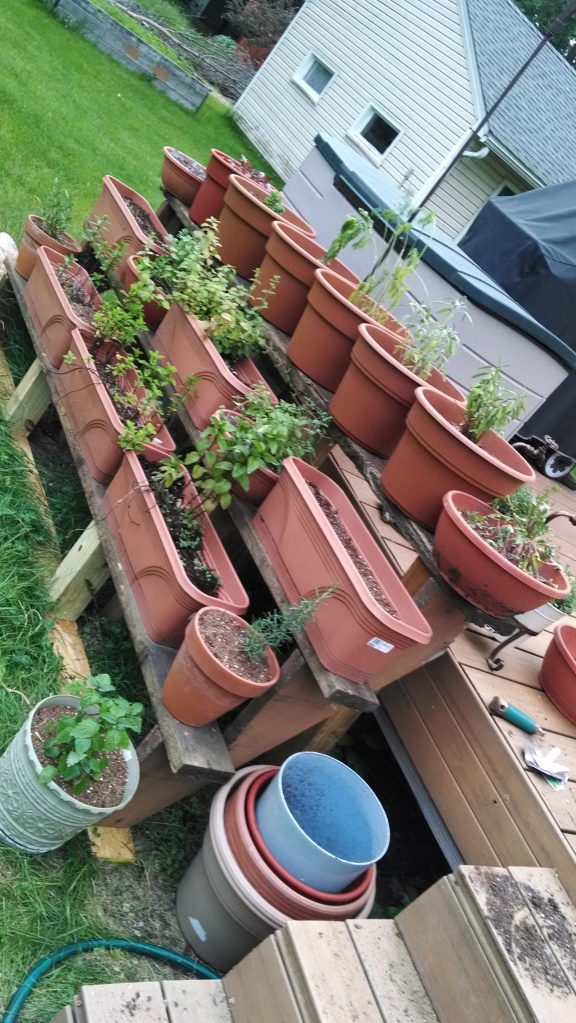
So over the winter, I discovered I have a gardening problem. I really, really, really like planting things. Since I’m in between houses and at my parents for the moment, I wanted to keep all my herbs and lettuces in pots for easy transplant and so that I can bring them inside during the winter, assuming my new house will have room for an indoor greenhouse haha. So I needed somewhere to put all my planters that would be out of the way but still get sun and be close enough to the house that I could go snip a few herbs for dinner. Thus began my disgusting process of hauling rotting 2×6’s (complete with nasty bugs) and most everything else with the lawn mower across the yard. I’m pretty happy with the end result and I did it all myself! Except for cutting the 4×4’s as I am still not allowed to use a saw.

Here is the end result!

Planter Stand

Planter Stand

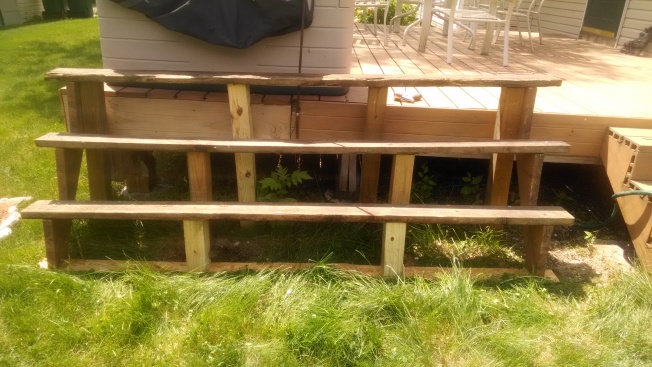
I’m pretty proud of it. Here is a picture of just the frame

Planter Stand

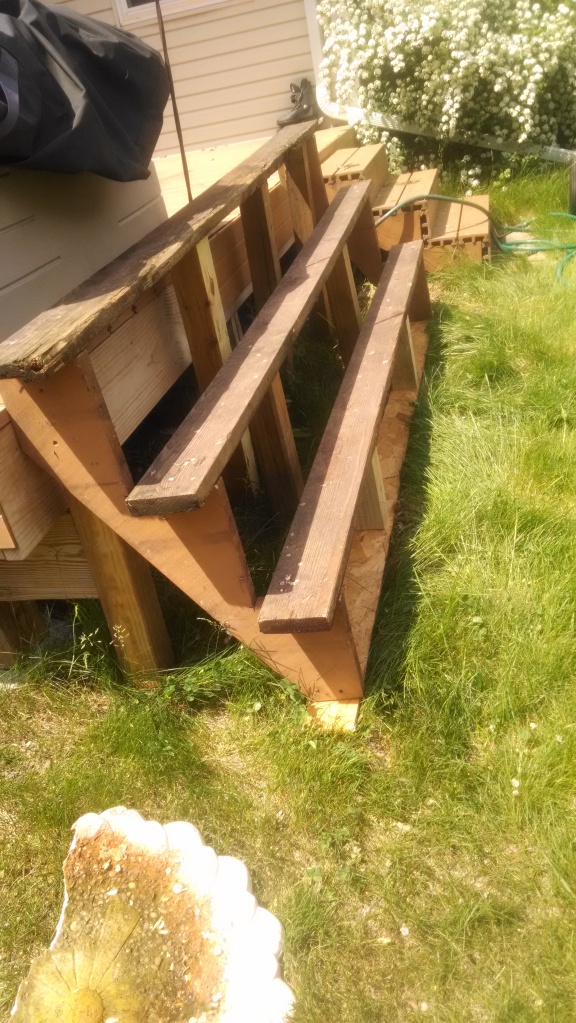
It’s made out of 2 stair risers, 3 2×6’s, and a couple spare 4×4 posts. You could definitely just use 4 stair risers if you have them or want it to look nicer, but I wanted to use what I had. That also meant using nasty, rotten wood. Hence all the 4×4 supports. I also am only using plastic planters on it right now just in case. My dad did test it and walk up it like stairs, and it’s still standing so that’s a plus. He wouldn’t walk on the top shelf though as that one was pretty iffy.

This project took a lot more work that it looks. The original stair risers were already connected to stairs so I had to take them apart and then get the new (rotten) 2×6’s. I could have used 2×8’s since they are 8 inches deep, but I didn’t have those available. Once I had connected all of the 2×6’s, I had my dad cut 4×4’s to the height needed and then just screwed them in place. It is free standing as it is just a temporary fixture until I get my own place.

Planter Stand

Ignore the broken bird bath in the bottom corner. I owe my mom a new one since I dropped this one moving it out of the way. Whoops!

The sad part is that my dad didn’t understand why it had to be so long. 8 feet?! He thought that was ridiculous. Until I filled it up. And still have 5 planters on the deck, three in the kitchen, and a decorative one on the pool deck. In addition to what I put in the vegetable garden. We will be eating good this year! Oh and I still have basil seeds to plant and some weird mini pumpkins on a stick. The gardening never ends! At least I don’t have to weed 😉

Zuchetti

Standard

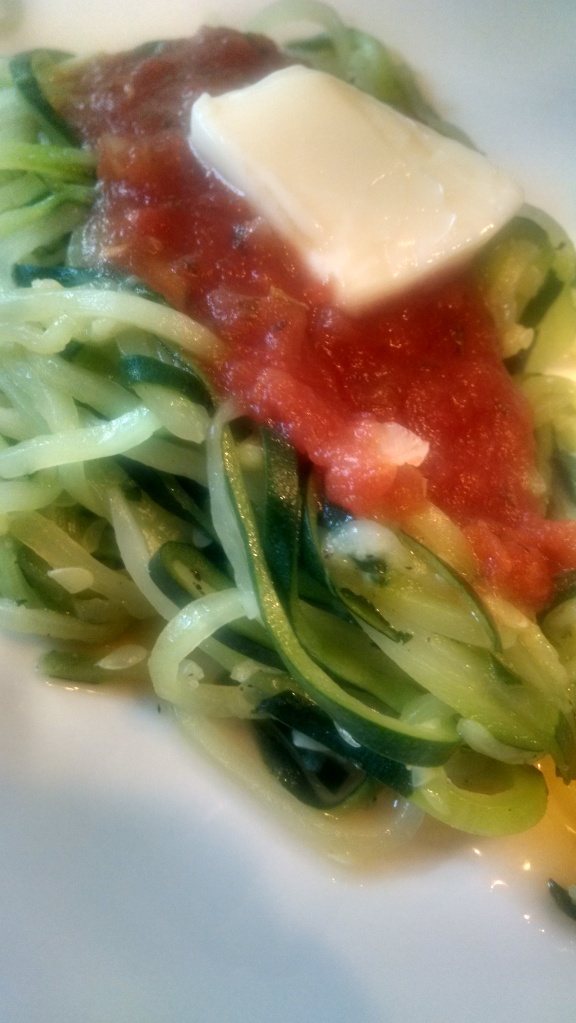
Zuchetti is my new favorite pasta. Or vegetable. Whatever. It’s zucchini julienned or put through a spiralizer and then eaten like spaghetti! And dang, it’s delicious! Zucchini is one of those vegetables that doesn’t have a ton of flavor and just sucks up whatever flavor you put on it which makes it perfect as a pasta substitute. I have used both a julienne peeler and recently invested in a spiralizer. When it comes to big jobs like this where I need 3+ zucchini sliced, the spiralizer has my vote. For garnish, the peeler works better. This is the Spiralizer I bought. It makes quick work of spiralizing anything and I love it.

Zuchetti

Zuchetti

1 Zucchini per person

1T EVOO

Salt and pepper

Enough sauce for however much zucchini you have. Go off of how much you make for spaghetti normally

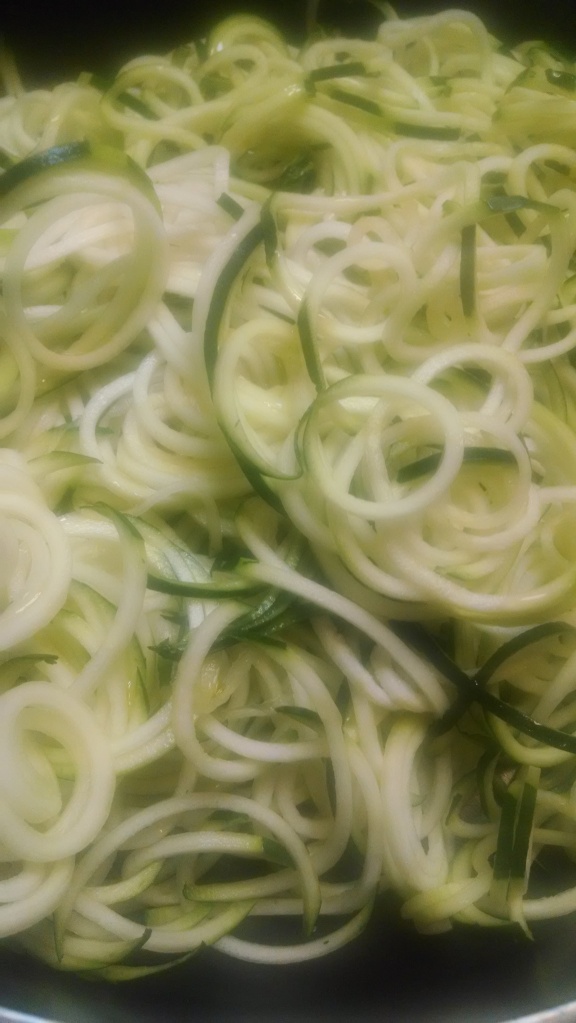
1. Spiral or julienne zucchini. It will look like a lot, but it does cook down

Zuchetti

2. Heat EVOO in a big pan and then add salt and pepper

3. Saute until zucchini is almost soft but not quite. Think al dente pasta.

4.Top with sauce and cheese if desired. I just use sauce and butter =]

Mother’s Day Garden Sign

Standard

I think I actually did a craft that turned out from Pinterest. This would not end up on this Buzzfeed post. At least I hope not. This was my first time ever using a wood burner and I really loved doing it! I will have to invest in some goggles though as my glasses did not stop the smoke from going into my eyes. For some reason, it didn’t occur to me that the burning wood would smoke. Who knew?! Anyway, I’m just going to show you some pictures now

Inspirational Pin

March 2011 137

And here is how mine turned out =]

20140510_195010

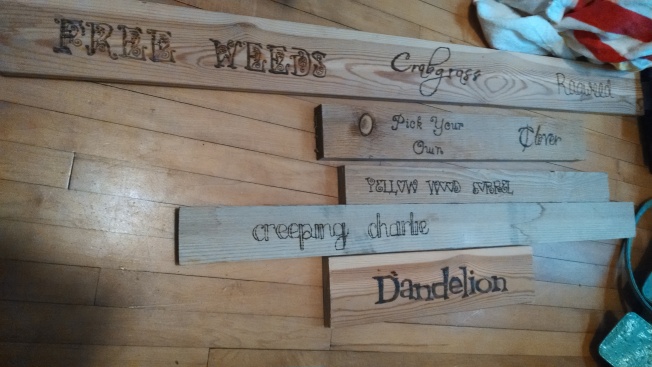
Yes, I realize you can’t tell what it says right now. Hold up, here’s a few working shots

IMG_20140508_144824888

The first one is after I got all the burning done and then this next one is after my dad cut it. Apparently, at 22, I’m still not allowed to use a power saw. Probably a good parenting decision, not gonna lie.

IMG_20140508_211238982

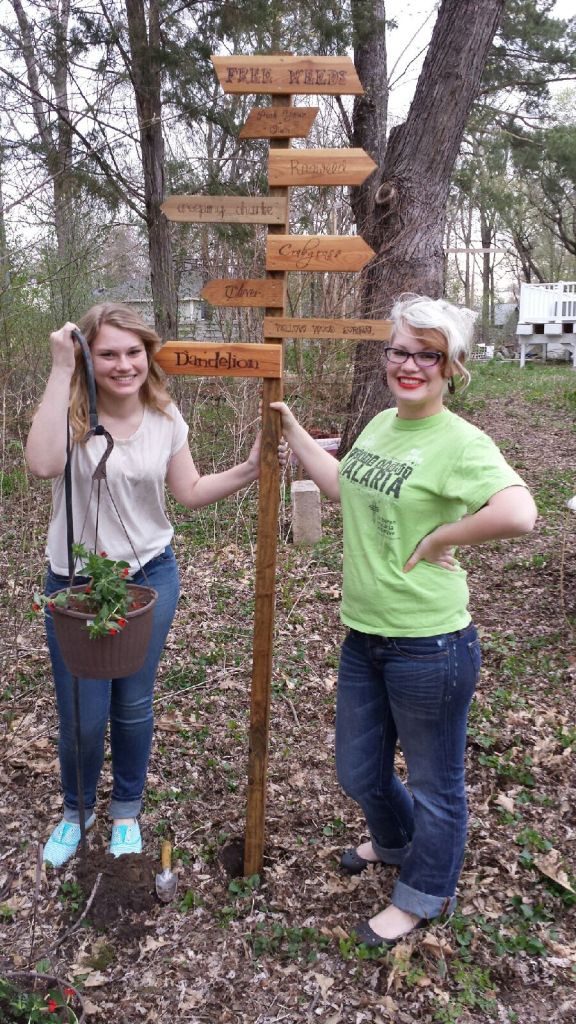
Then my sister and I stained it and nailed it to a 2×2 and put it in the ground. I thought I had more pictures, but apparently, I don’t. So these will do as they are lovely. Yes, I did look up local weeds as well so that it was an accurate description of my mom’s garden haha.


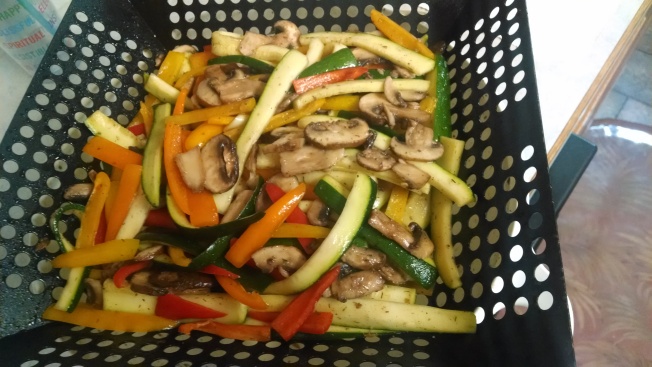
Grilled Zucchini, Mushrooms, and Peppers

Standard

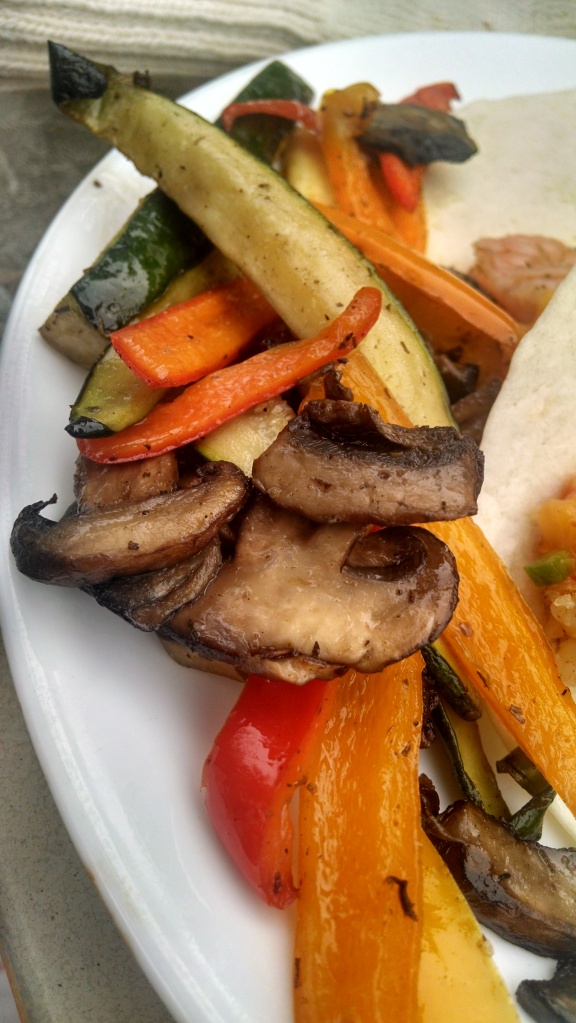
So I made these to go with Shrimp Tacos mainly because my sister doesn’t eat meat and this would be substantial enough to make veggie tacos with. I would have been right if us carnivores hadn’t eaten most of it. Sorry Sara. They were so delicious that I’m making them for Father’s day this weekend too. Yumm!

Grilled Peppers, Mushrooms, and Zucchini

Grilled Zucchini, Mushrooms, and Peppers

1 8oz pack Mushrooms

3 Zucchini

10 Mini sweet peppers

2T Old Bay

1T Garlic salt

1T Pepper

2T EVOO

1. Slice the mushrooms, zucchini, and peppers and toss with EVOO, Old Bay, garlic salt, and pepper.

2. Stick in a grill basket and grill until tender. Took about 20 minutes for mine =]

3. Eat all of them before your vegetarian sister can get to them. Once again, sorry Sara

Grilled Peppers, Mushrooms, and Zucchini

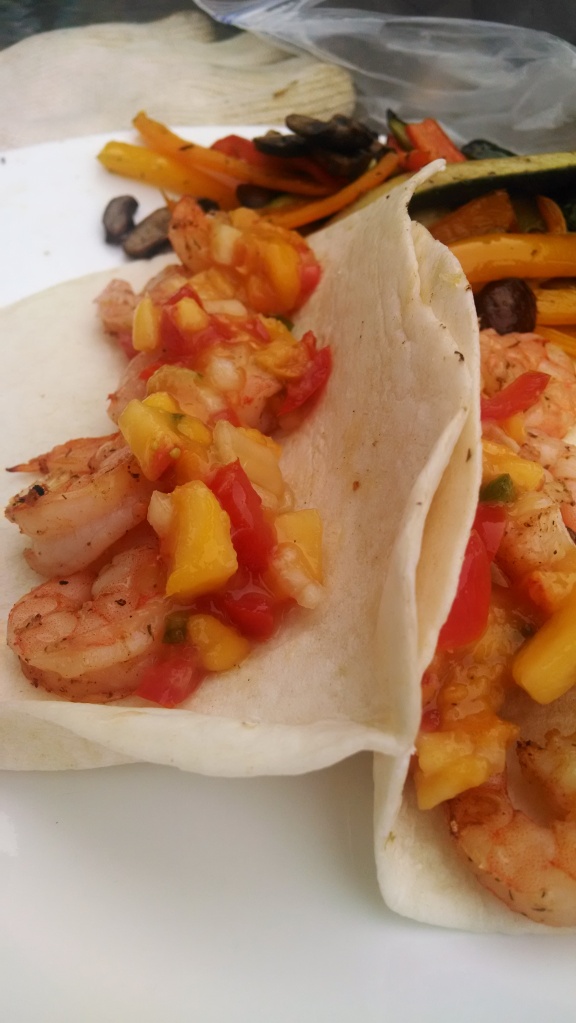
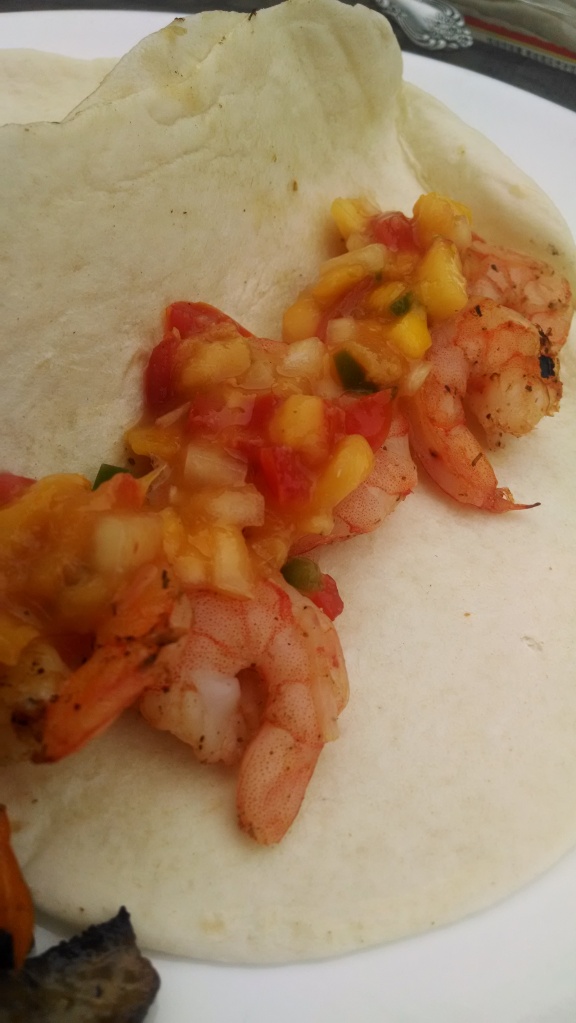
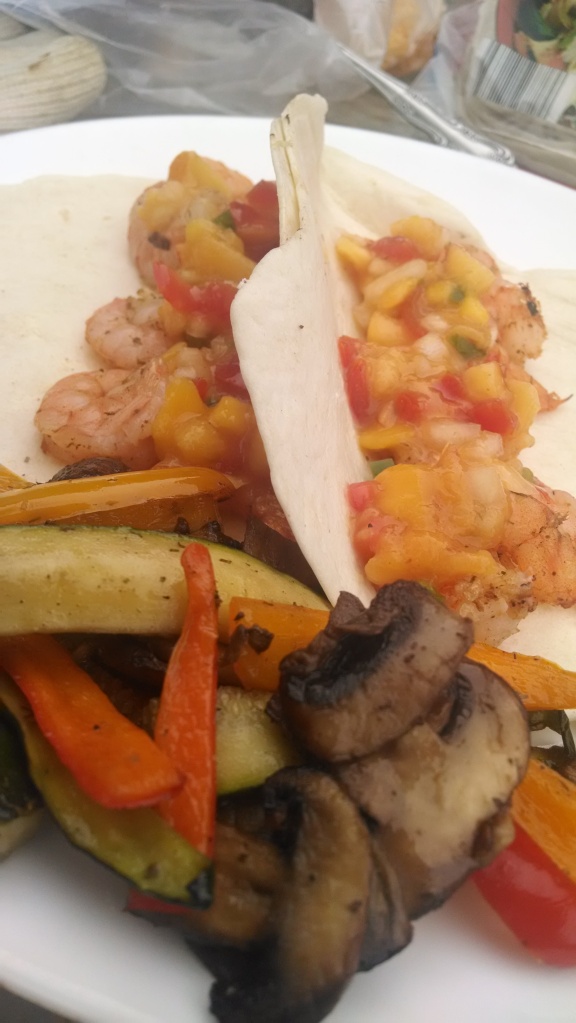
Grilled Shrimp Tacos with Mango Peach Salsa

Standard

Ok, after being in Louisiana and being able to get fresh seafood, I am a little deprived being back in the Midwest. Ok, really deprived. That is, until I found out that my favorite discount grocery store, Aldi, sells shrimp. And they’re the cheapest I could find. AND my grandma voted them the second best she’s ever had. Only second to the ones I made on Christmas that were fresh from LA. They aren’t harvested in the US which kind of sucks, but they taste super freaking delicious. So I made them into tacos!

I also made this awesome fruit salsa that no one believed would taste good. After letting it sit in the fridge for like an hour, I tried to get my family to taste it and they all looked at me weird. Like I was ET or something. And then they all loved it on the tacos! I served them with some awesome Grilled Veggies too for my veggie sister, but I will now be making them all the time, cause they were yummy.

Grilled Shrimp Tacos with Peach Mango Salsa

Original Recipe

Grilled Shrimp Tacos with Mango Peach Salsa

1 1/2lbs Raw shrimp, peeled and deveined

1T Old Bay type seasoning, I used an off brand cause that’s what was in the cupboard

1T Garlic salt

1T Pepper

2-3T Lime juice

Tortillas

Any other fixings you might want, but I didn’t use any

Salsa:

2 Peaches

1 Mango

1/2 Onion

12ish Cherry tomatoes

1 Jalapeno, seeded

1T Lime juice

2T Sugar

Salt and pepper to taste

1. Early in the day or the night before, prep your salsa so the flavors have time to blend. It’s pretty tricky. Chop up all the fruit and veggies and put it in a bowl. Add the lime, sugar, and salt and pepper and pop it in the fridge to chill

2. Marinate shrimp in old bay, garlic salt, and pepper. I do this while the grill heats up

3. Right before you put the shrimp on the grill, toss them with the lime juice

4. You can either skewer the shrimp if they’re big enough, or use a grill tray thingy to cook the shrimp on. I opted for the tray since I was making a lot of shrimp. Make sure you spray the tray with nonstick before putting the shrimp on it so they don’t get stuck

5. Grill the shrimp just long enough so that they turn pink and opaque. You can flip them if you want, but I figure, you don’t flip meat in the oven usually, so why do it on the grill. It’s just an outside oven.

6. Assemble tacos with the fruit salsa and whatever else you crave and enjoy!

Grilled Shrimp Tacos with Peach Mango Salsa

Shameless sneak peak of Grilled Veggies 😉

Grilled Shrimp Tacos with Peach Mango Salsa

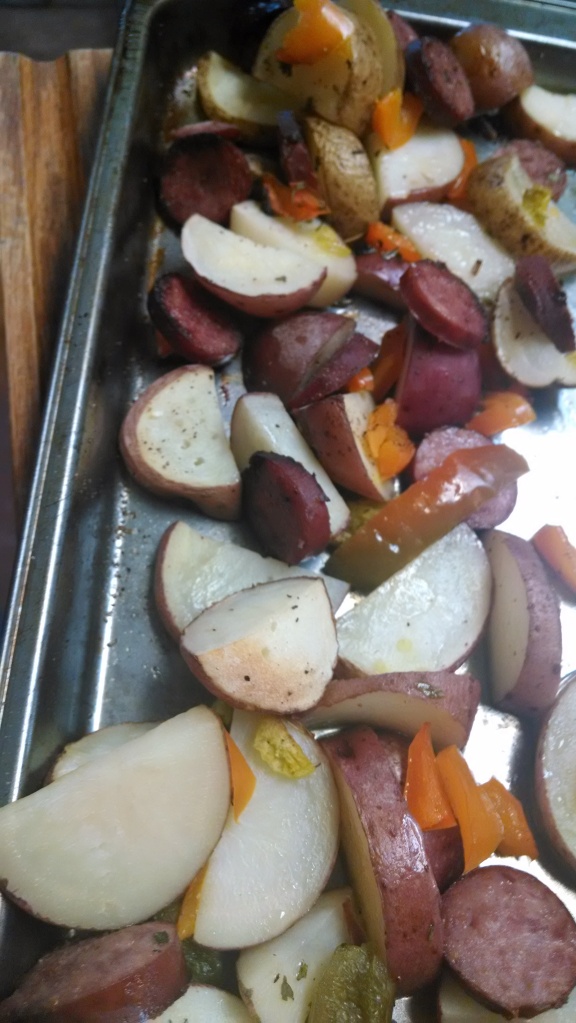
Sausage, Pepper, and Potato Bake

Standard

This is pretty much a no-fail recipe. You put some veggies on a cookie sheet, sprinkle them with oil and herbs and bake it. I have yet to mess it up. I do like to use canned pepperoncini peppers and sprinkle some of the juice on there but you could use any canned pepper or fresh pepper. This time I used a mixture of canned and some frozen ones left over from the garden last summer and they were wonderful!

Sausage, Pepper, and Potato Bake

Original Recipe

1lb Smoked sausage

3-5 Potatoes, depending on how many you want

Peppers. I used probably 1c various bell pepper about 6-7 pepperoncinis

2T EVOO

Salt and pepper

Italian seasoning, if you want

1. Preheat the oven to 400 degrees

2. Slice up the sausage and dice the potatoes and peppers to however big of chunks you like. The smaller the potato chunks, the faster it will cook

3. Spray a cookie sheet with nonstick spray and lay out sausage, potatoes, and peppers. Drizzle with EVOO and sprinkle with salt, pepper, and Italian seasoning, if using

4. Bake 30-45 minutes, or until potatoes are fork tender

Sausage, Pepper, and Potato Bake

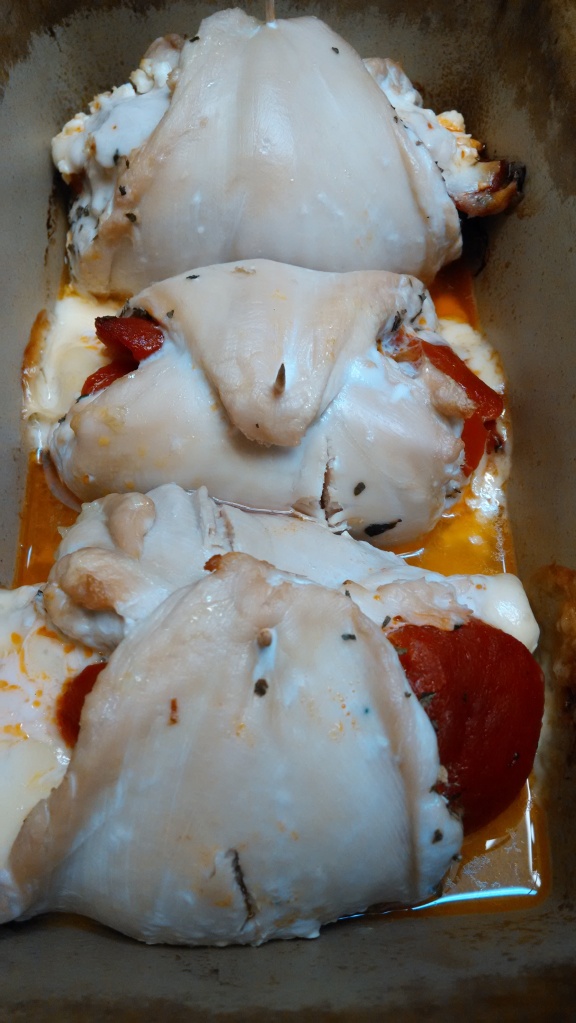
Roasted Red Pepper Stuffed Chicken

Standard

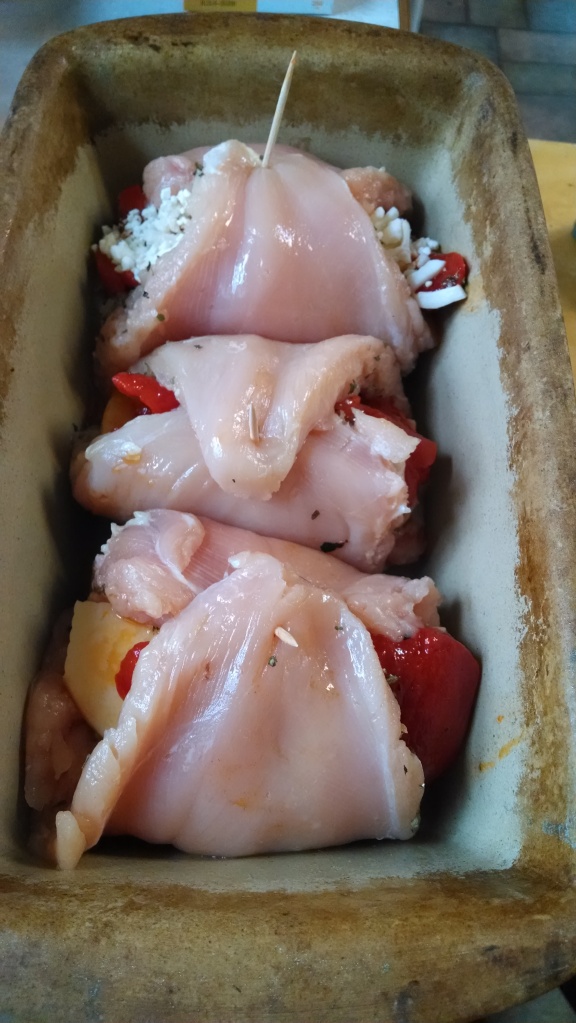
Something I love is coming home and being able to put dinner right in the oven. Or at least with very little prep. I love little prep. These stuffed chicken breasts are really more rolls and don’t even require you to make a filling. They’re so easy and delicious!

Roasted Red Pepper Stuffed Chicken

Original Recipe

Roasted Red Pepper Stuffed Chicken

3 Chicken breasts, pounded thin

3 pieces Roasted red pepper, I used canned

Cheese, I used smoked Gouda on two and a mix of mozzarella and feta on the last one. Both were delicious!

Basil, dried

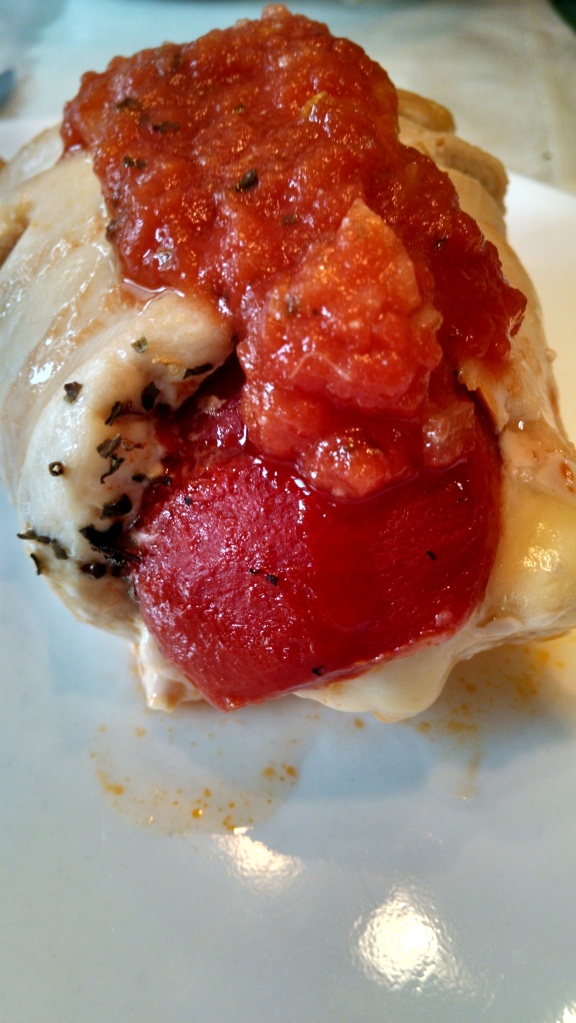
Spaghetti sauce, if desired, to top

1. Preheat oven to 350 degrees

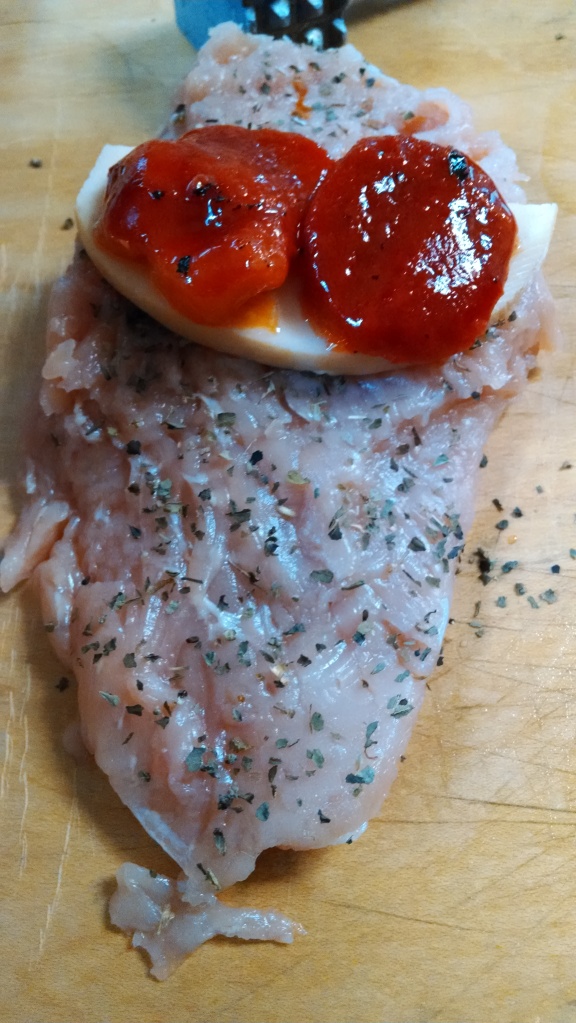
2. Lay out chicken and shake on a decent amount of basil. Top with cheese and roasted red pepper

Roasted Red Pepper Stuffed Chicken

3. Roll up and stick with a toothpick so it sticks together while they cook

Roasted Red Pepper Stuffed Chicken

4. Cook for 30-40 minutes, or until chicken is no longer pink in the middle and top with sauce if desired

Roasted Red Pepper Stuffed Chicken

Chicken Enchiladas with Avocado Cream Sauce

Standard

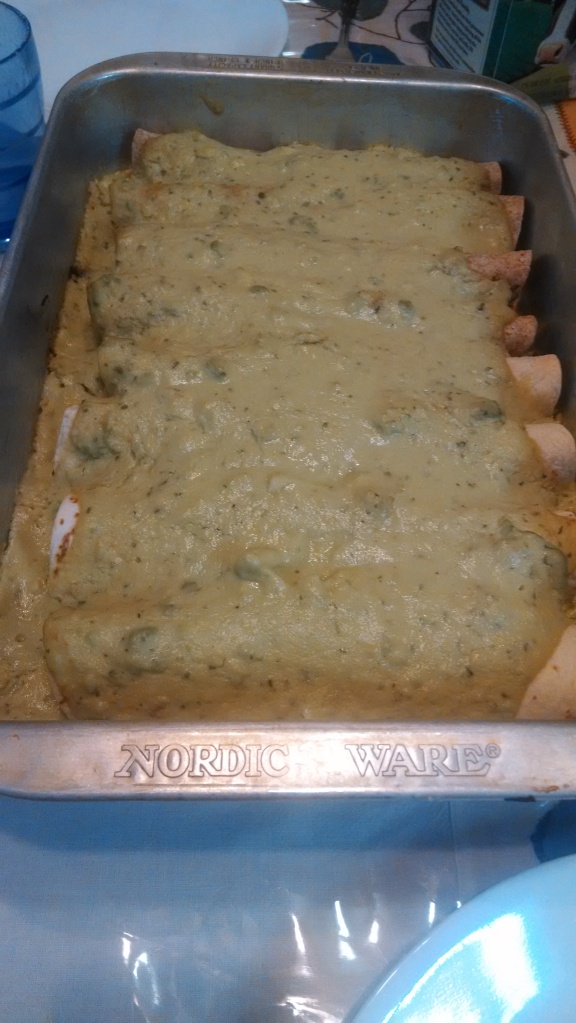
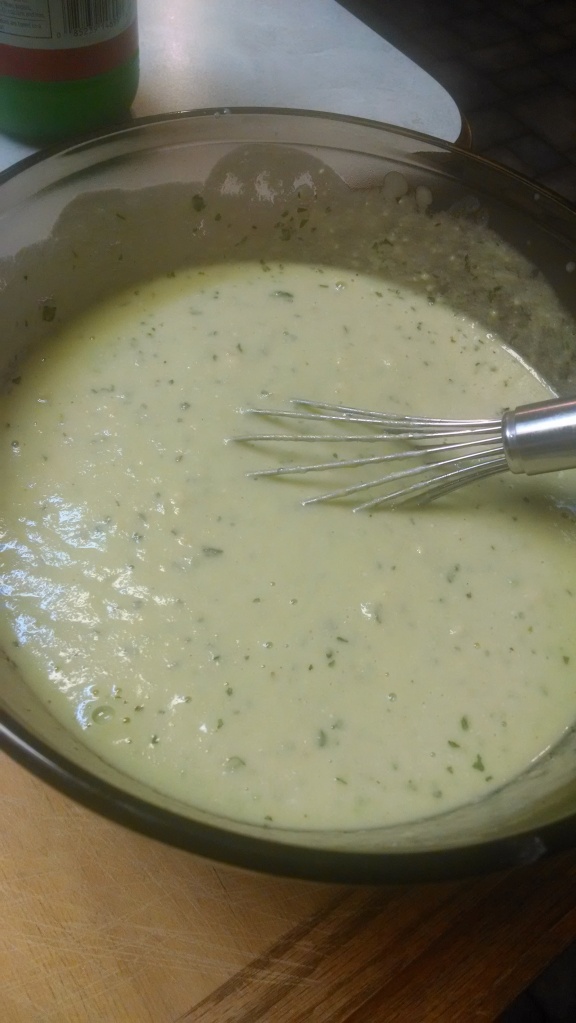
Let me tell you about these enchiladas. They are the most delicious thing I have ever made in my life. I say that a lot, but dang, these are super delicious. They do take a little bit of time but it is so worth it. If you want to skip a little time, you can always make the filling the night before and just make the sauce and bake them the night of. I haven’t make the sauce in advance before, but I do usually have left over sauce and eat it for a few days on EVERYTHING. Think scrambled eggs with pepper jack and avocado sauce. Yea, it’s good. There’s not much I changed with this recipe other than adding an avocado to the sauce and being lazy and just mashing the sauce instead of blending it until smooth. But I like chunky avocados.

Chicken Enchiladas with Avocado Cream Sauce

Original Recipe

Chicken Enchiladas with Avocado Cream Sauce

1 Onion, diced

2 Jalapenos, seeded and diced

3-4 Chicken breasts

1c Frozen spinach, thawed and drained

2-3c Cheese, I usually use a taco blend or monterrey jack

2T Cilantro

2T EVOO

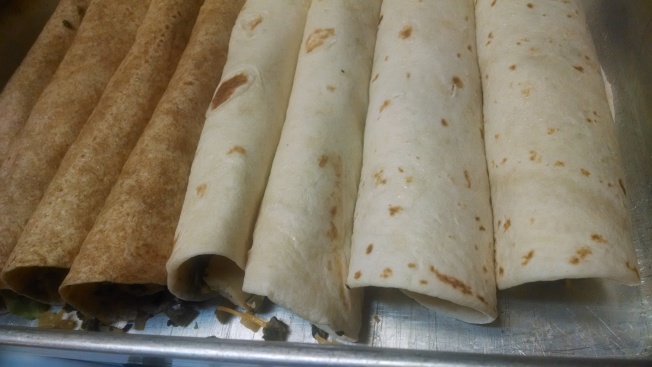
8-10 Tortillas, I used half whole wheat and half white

Avocado Sauce:

2T Butter

2T Flour

2c Broth, I used chicken

3/4c Sour cream or Greek yogurt, I was going to use Greek yogurt but ran out so had to use sour cream. They should both work

1/2t Cumin

1t  Garlic salt

1/4t Pepper

3 Avocados, peeled and pitted

4T Cilantro, dried

2T Lime juice

1. Preheat oven to 350

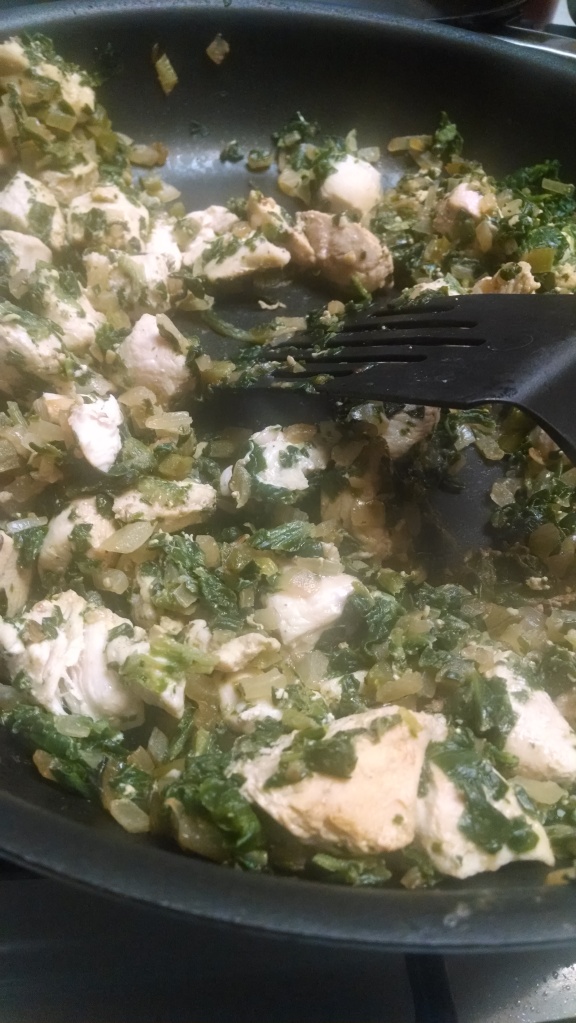
2. Heat EVOO in skillet and cook chicken, onions, and jalapeno until veggies are soft and chicken is no longer pink

3. Shred chicken with fork and combine with cilantro, spinach, and cheese

Chicken Enchiladas with Avocado Cream Sauce

4. While the chicken and veggies are cooking, melt butter with flour and add chicken broth and bring to a boil.

5. Stir in sour cream, cumin, garlic salt, pepper, avocado, cilantro, and lime juice. Either mash together until combined like I did or add to a blender/food processer.

Chicken Enchiladas with Avocado Cream Sauce

6. Assemble enchiladas by filling with 1/8 of the filling in each tortilla and rolling up, placing seam side down in a baking dish

Chicken Enchiladas with Avocado Cream Sauce

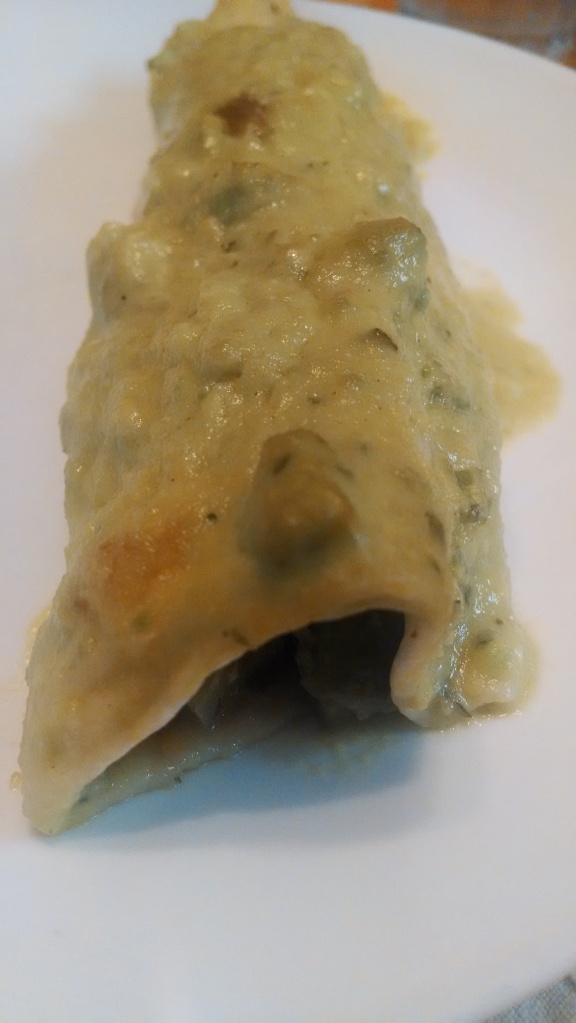
7. Top all tortillas with avocado sauce and then lick the bowl. Yes, this is necessary.

8. Bake for about 20 minutes or until everything is toasty warm and devour!

Chicken Enchiladas with Avocado Cream Sauce

Las Vegas!!!

Standard

So over Cinco de Mayo weekend, this girl was in Vegas! Anyway, just wanted to share a few of my experiences and pictures with you guys!

We had a lot of plane and airport trouble and didn’t get in until about 2am so the first night we were exhausted. So we bought champagne at Walgreens and called it a night. This was honestly good champagne, minus the fact that I exploded it all over my friend’s suitcase, but that’s not important. It was so bubbly that I could barely drink it but the next day it was perfect! And, pretty cool souvenir if I say so myself.

Vegas Baby!

On Cinco de Mayo we went out to Senor Frogs and got drinks and dinner. The drinks were delicious and the food delicious but the best part was I got sat in front of the “I’m sexy and I know it” sign and there is a lady who makes balloon hats! I’m not sure where you go to school for that, but she was awesome. So I got a lips balloon hat, and yes, I wore it all night. Even after we left the bar =] No shame!

Vegas Baby!

This is the Hoover Dam. It was boring. This isn’t even the dam cause the dam was ugly, so this is the body of water over it. Boring.

Vegas Baby!

We did an O2 bar for the first time too. It was pretty weird, but it smelt good. Had to try it once, right?

Vegas Baby!

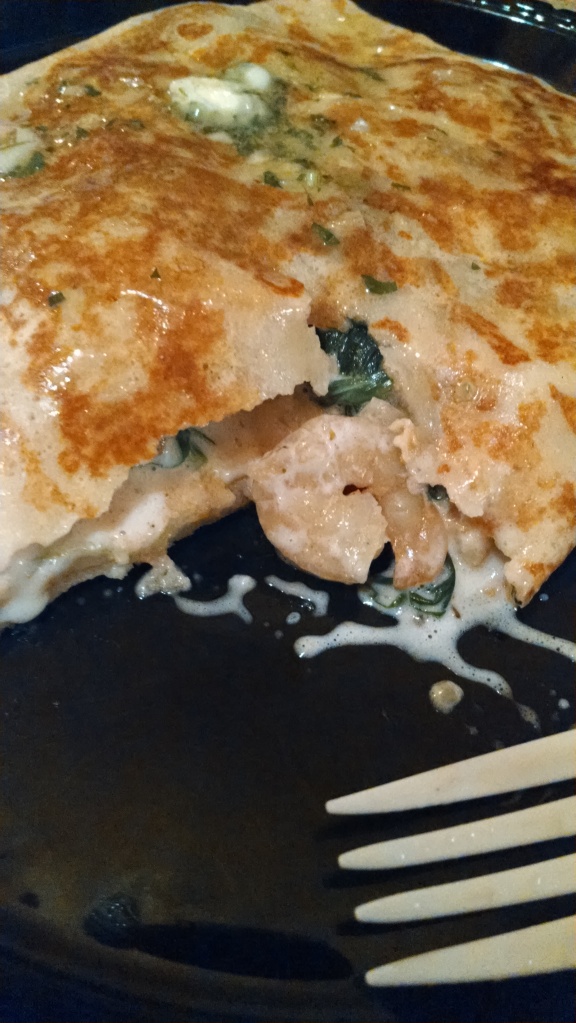
Oh, and favorite meal. Shrimp Scampi Crepes! These were seriously delicious and I could eat them everyday for a year. Or ten. Just saying…

Vegas Baby!

We did a ton more stuff but I don’t have the pictures for it so here’s just a sample. I had an awesome time in Vegas and can’t wait to tag along when my relatives go later this year!